Stitching HDR panoramas using Adobe Lightroom
While travelling through the Netherlands, I often find myself without my Canon DSLR at hand. Instead, I take photos using my iPhone. Regrettably, of course, it comes with a limited lens with a fixed focal length. To counter this, people often use the built-in panorama features of their phones. However, these do not combine well with situations requiring a high dynamic range, which I blogged about last time.
Now, I'm an avid believer in RAW photography and editing afterwards, as it enables recovering all sorts of details from photos. Hence, I generally don't use the stock camera app. Instead, I use a third-party apps like Camera+ or Halide to take RAW photos, and stitch them together afterwards.
Getting started
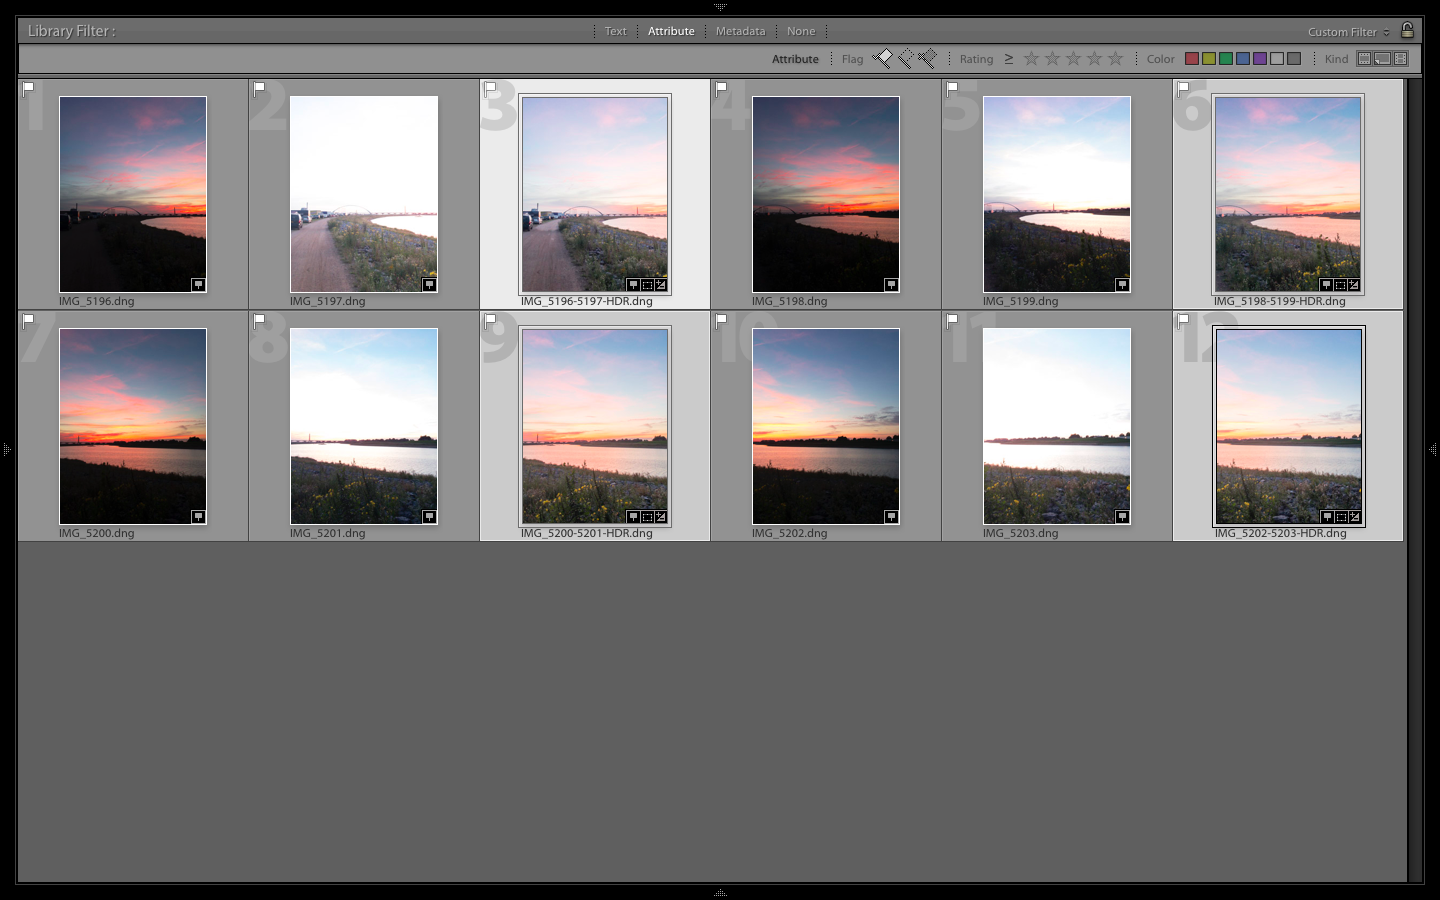
In this example, I will explain the editing process using Adobe Lightroom Classic CC, combining eight photos I took on a summer's evening in Nijmegen. Consider the following library view.
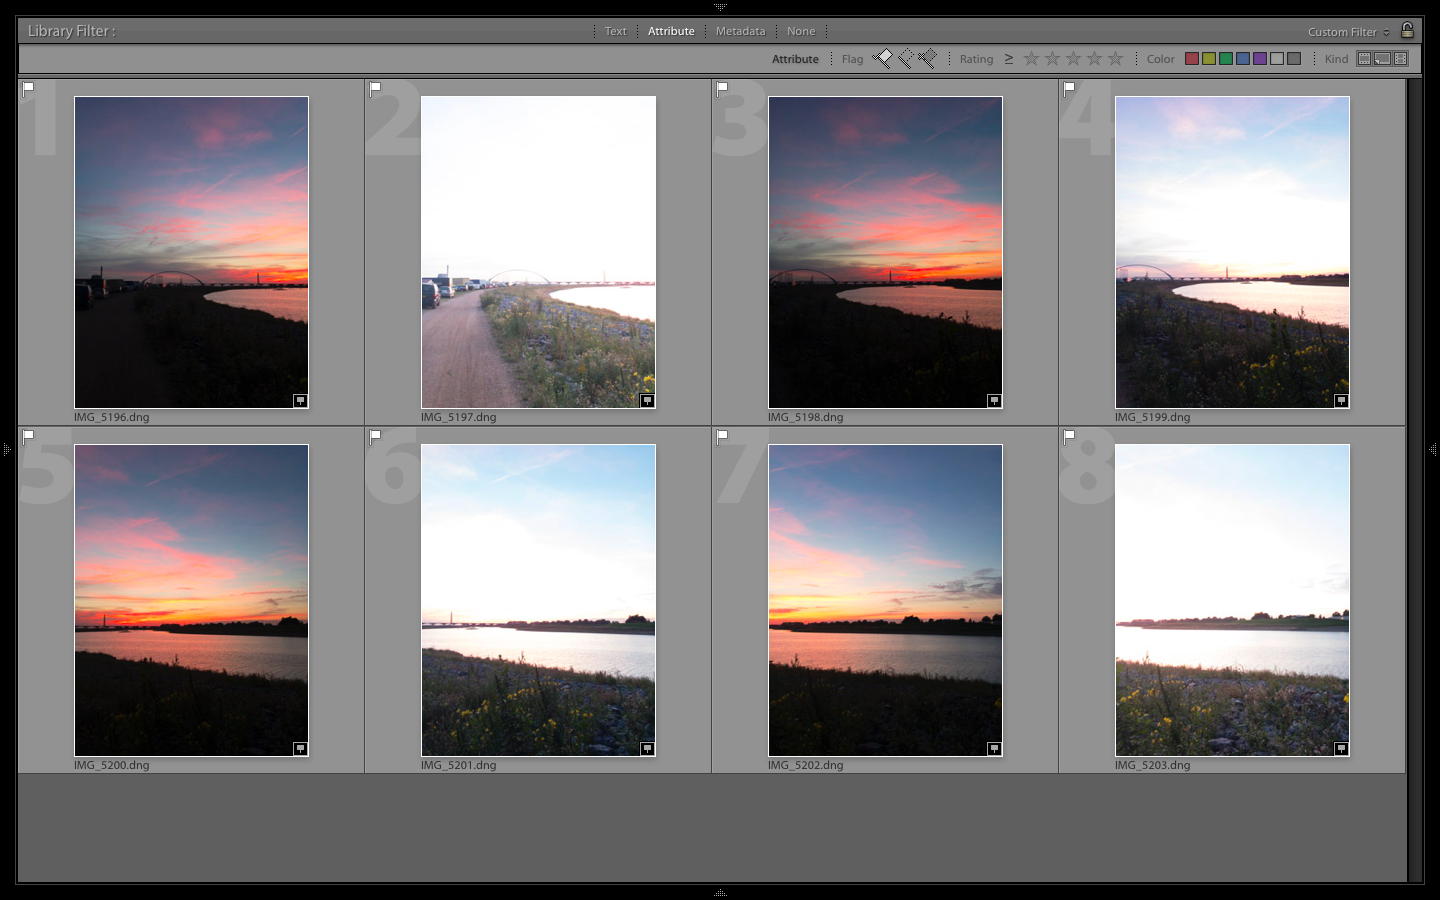
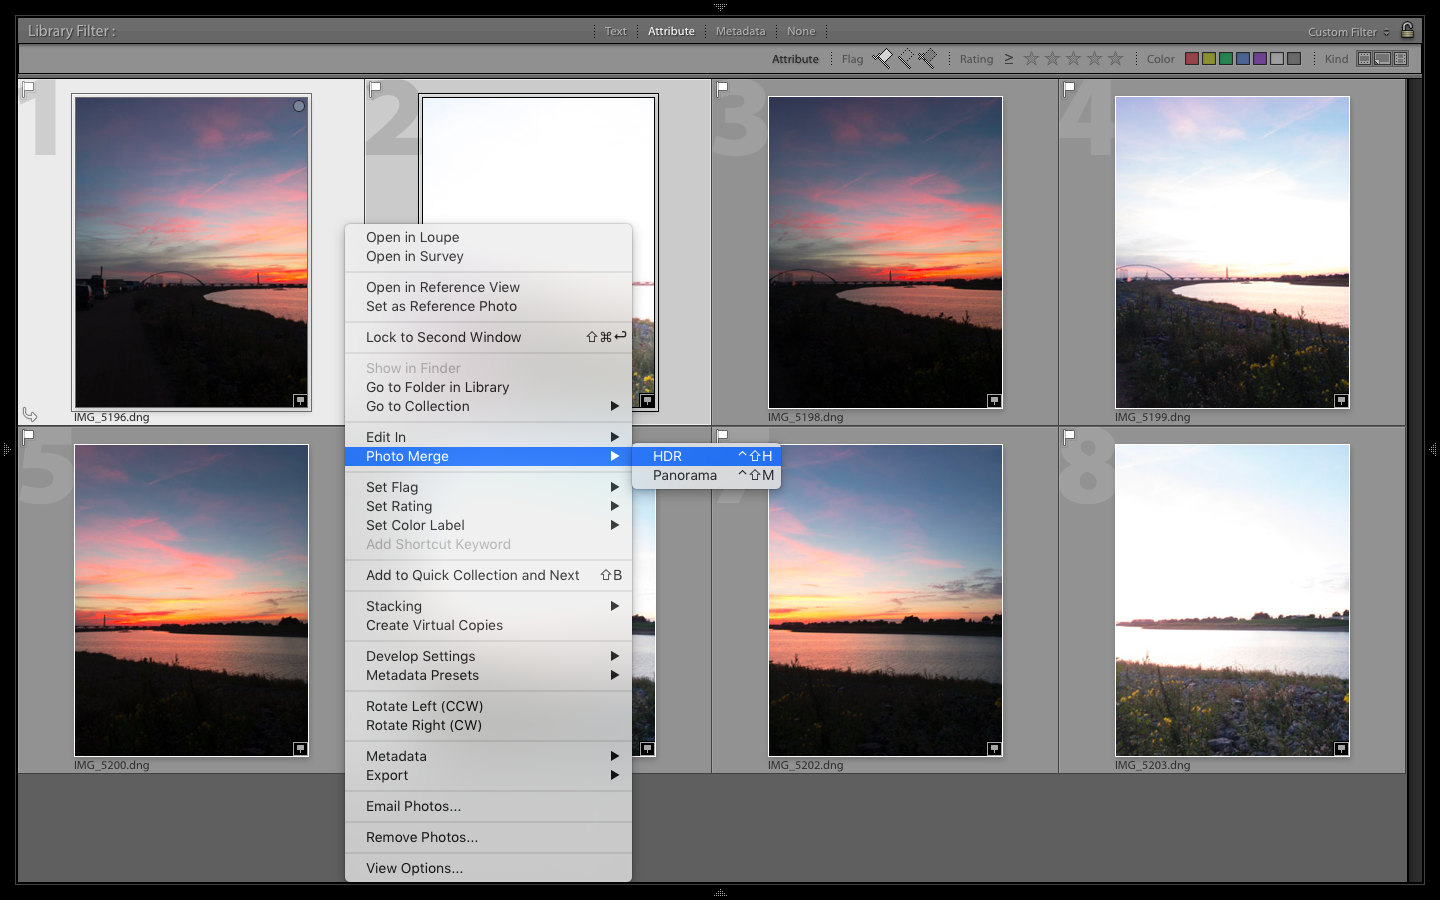
Each of these images is either exposed on the sky, or on the ground. Recall from the previous blogpost that we can combine each of these pairs into an HDR image. As we did last time, select the pair of images, then right-click, point to 'Photo merge...' and select 'HDR'.
Update: As of 15 October 2018, Adobe Lightroom Classic CC (version 8.0 and higher) includes an option for making an HDR panorama as well. This simplifies the procedure outlined below quite a bit. You can skip the process of making HDR images first, and go straight into making an 'HDR Panorama'.
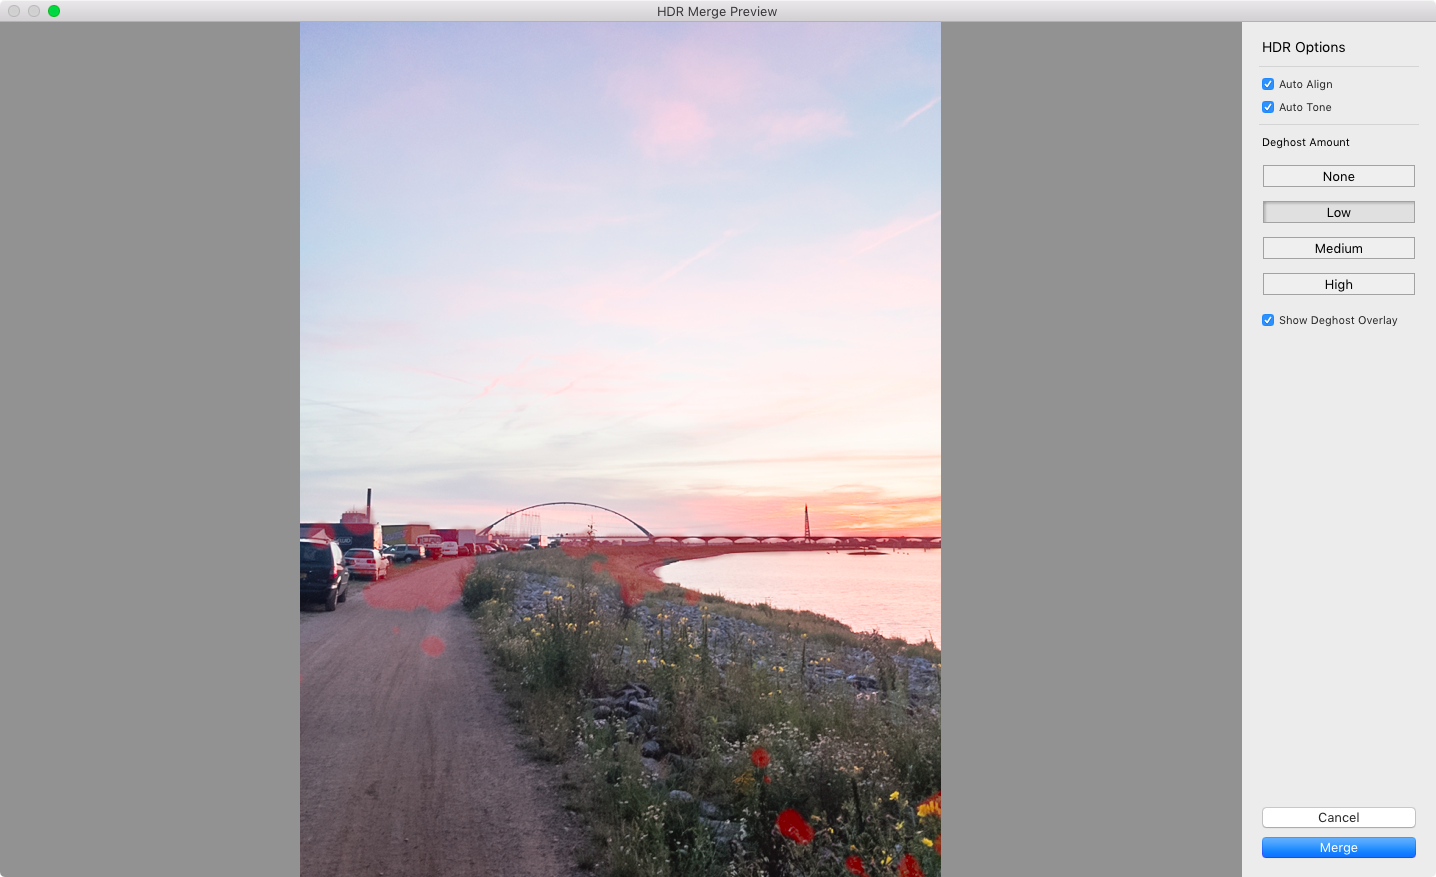
In the next screen, Lightroom renders a preview for the combined image. If elements of the photo have moved, the combining process may lead to ghosting effects: traces of the elements may appear in several places. Fortunately, Lightroom offers deghosting options. It's worth fiddling around with them and seeing which value best suits your images.
Click 'Merge' when you're satisfied.
Repeat the process for the other pairs. Note that, by default, Lightroom names the generated images after the primarily selected image. Personally, I prefer to rename them to include the range of photos combined.
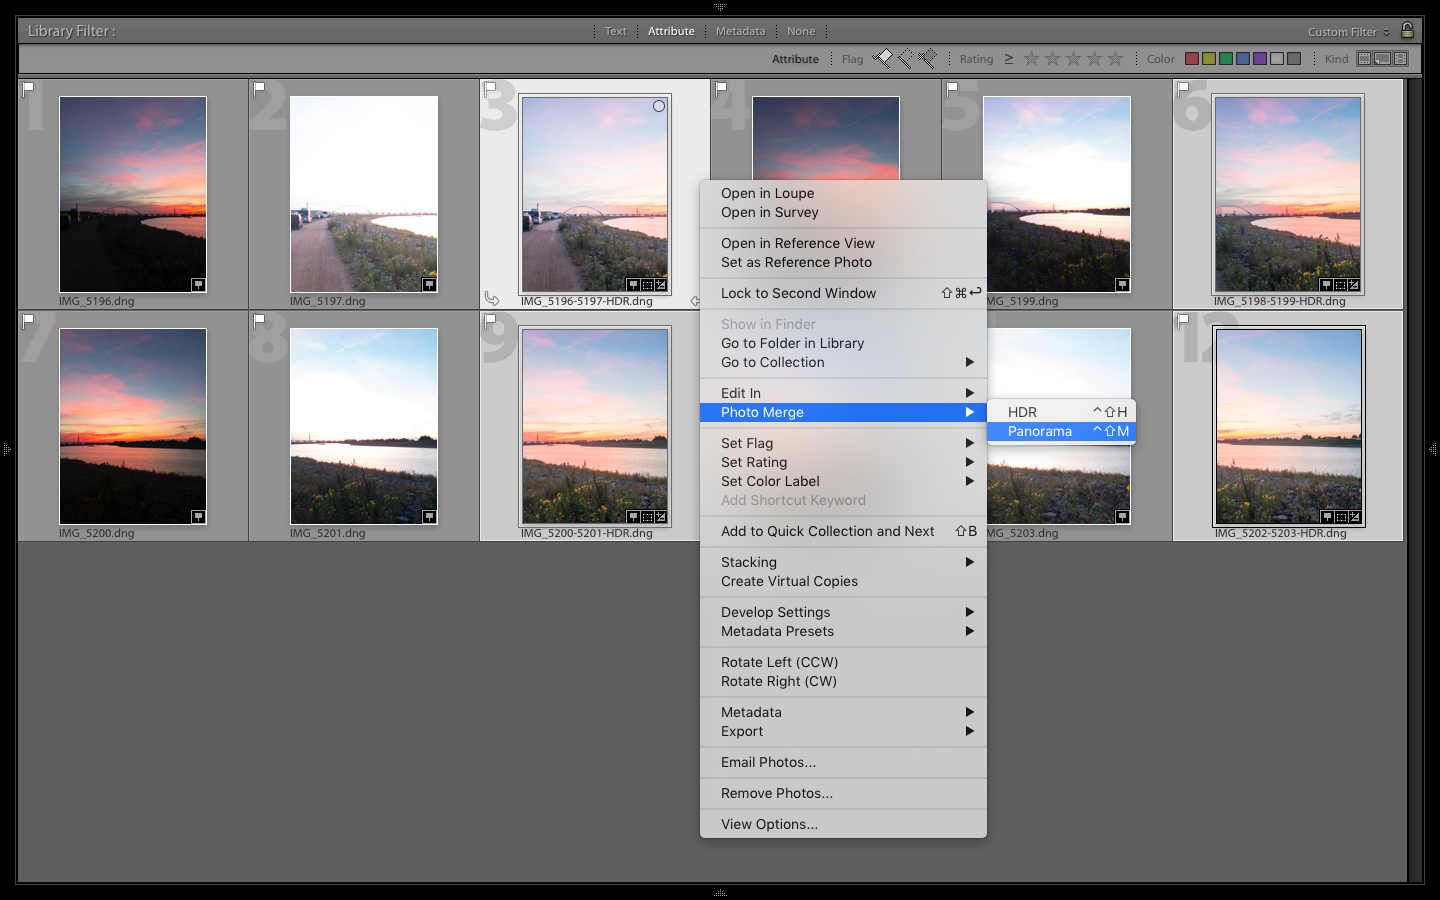
Now, let's make a panorama out of these. Select the HDR images we just generated, right-click, point to 'Photo Merge...' and click 'Panorama'.
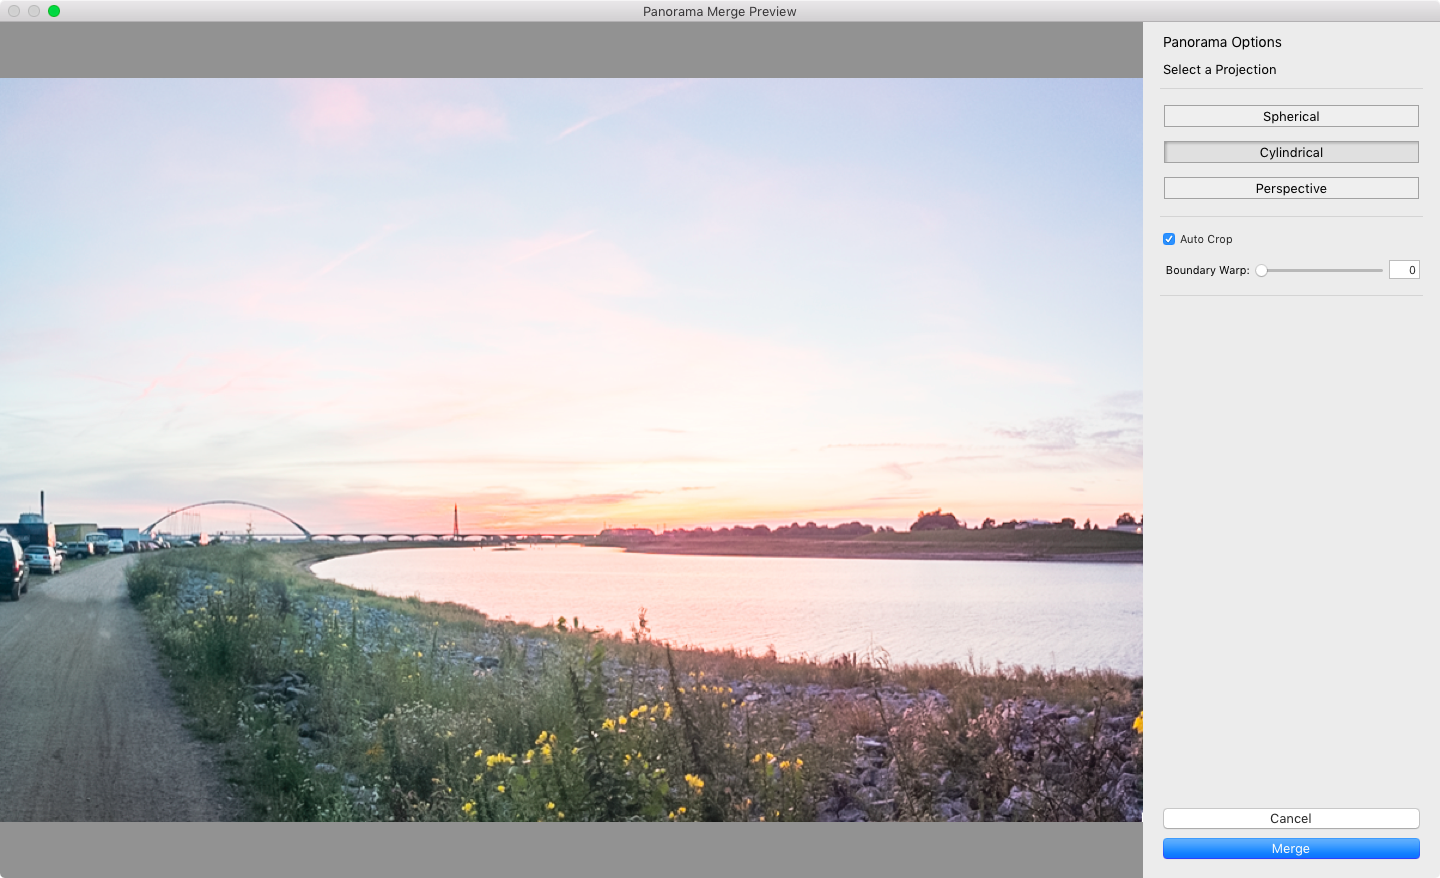
Again, the next screen contains a preview for the combined image. In this case, we don't have to worry about ghosting, though. Instead, we have to make a selection out of three projections: spherical, cylindrical, or perspective. Which one to choose really depends on how you rotated the camera when taking the individual photos. Typically, if you rotated from a fixed point, either spherical or cylindrical will do — imagine sticking the images to the surface area of either geometrical shape.
Note that, at this stage, the colours don't necessarily look nice yet, so my advice would be to just worry about the projection here. Click 'Merge' when you're satisfied.
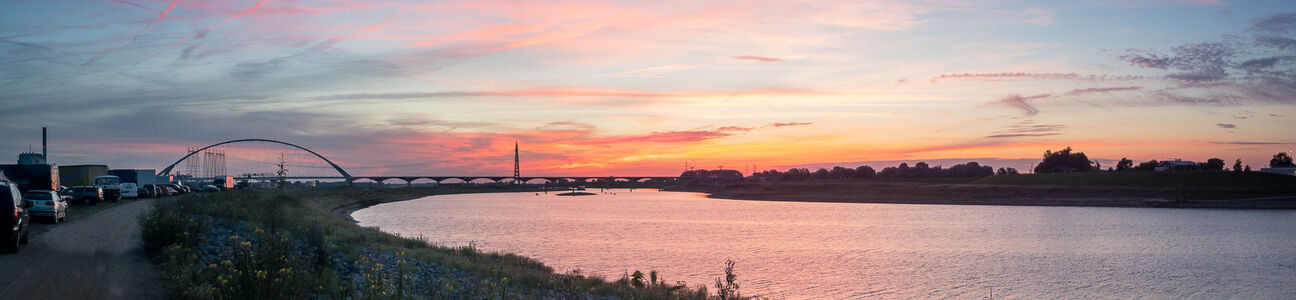
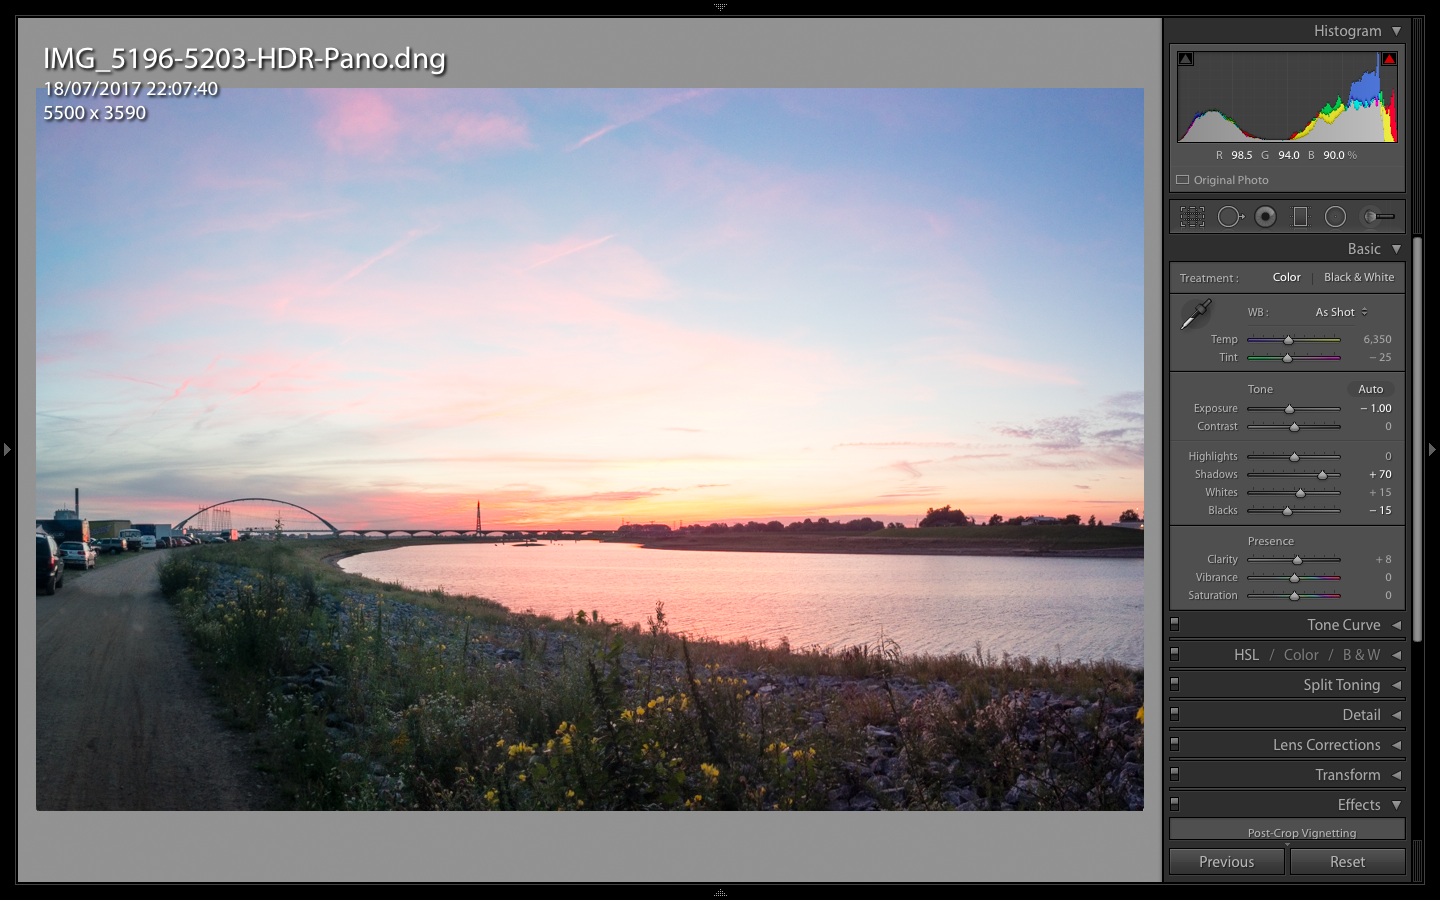
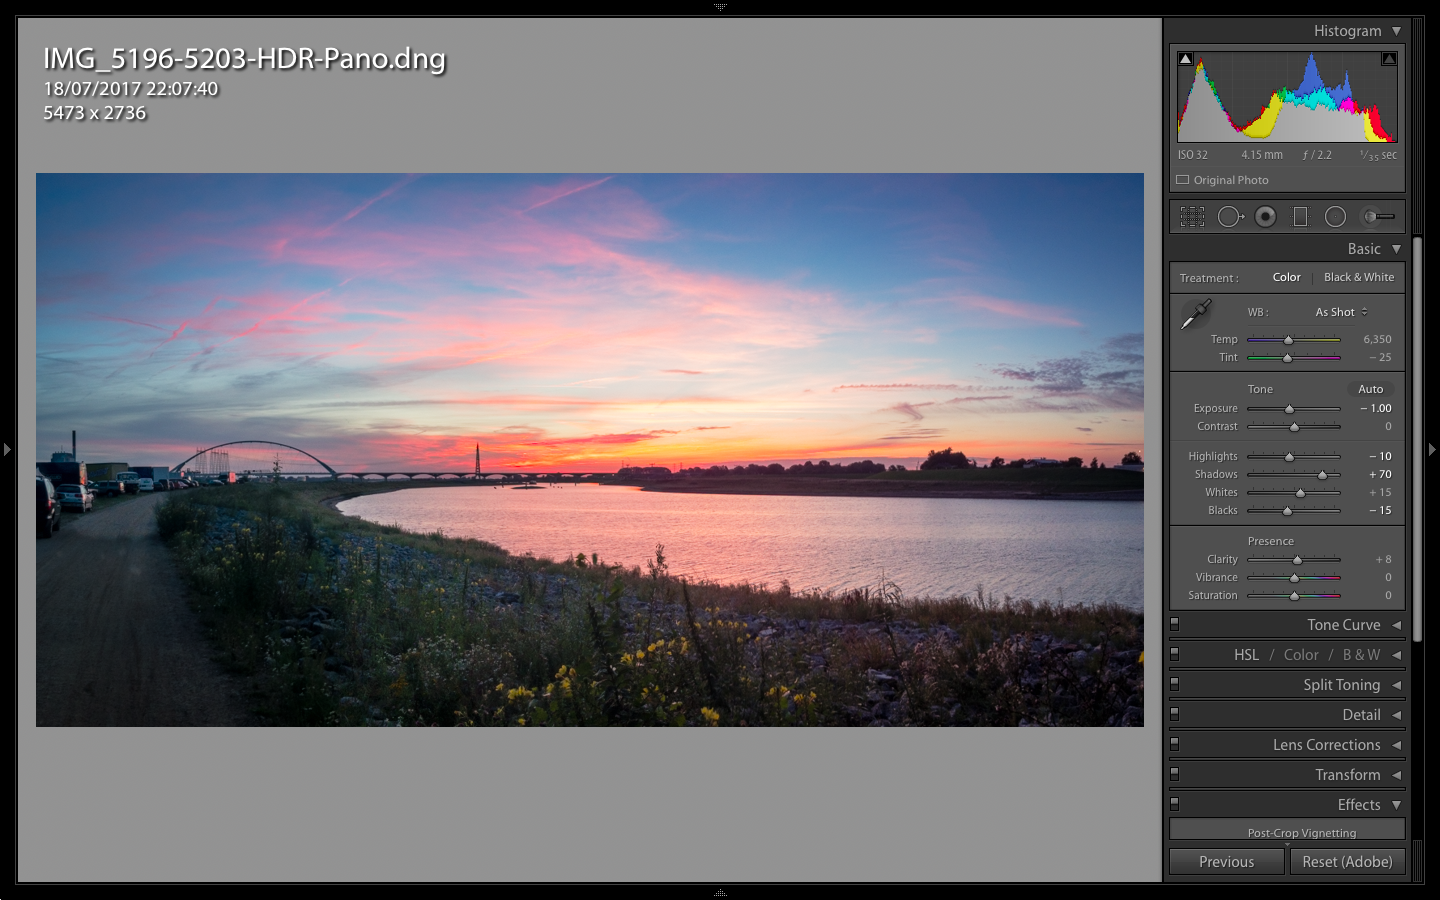
As mentioned, the colours are way off at this stage, so let's address that first.
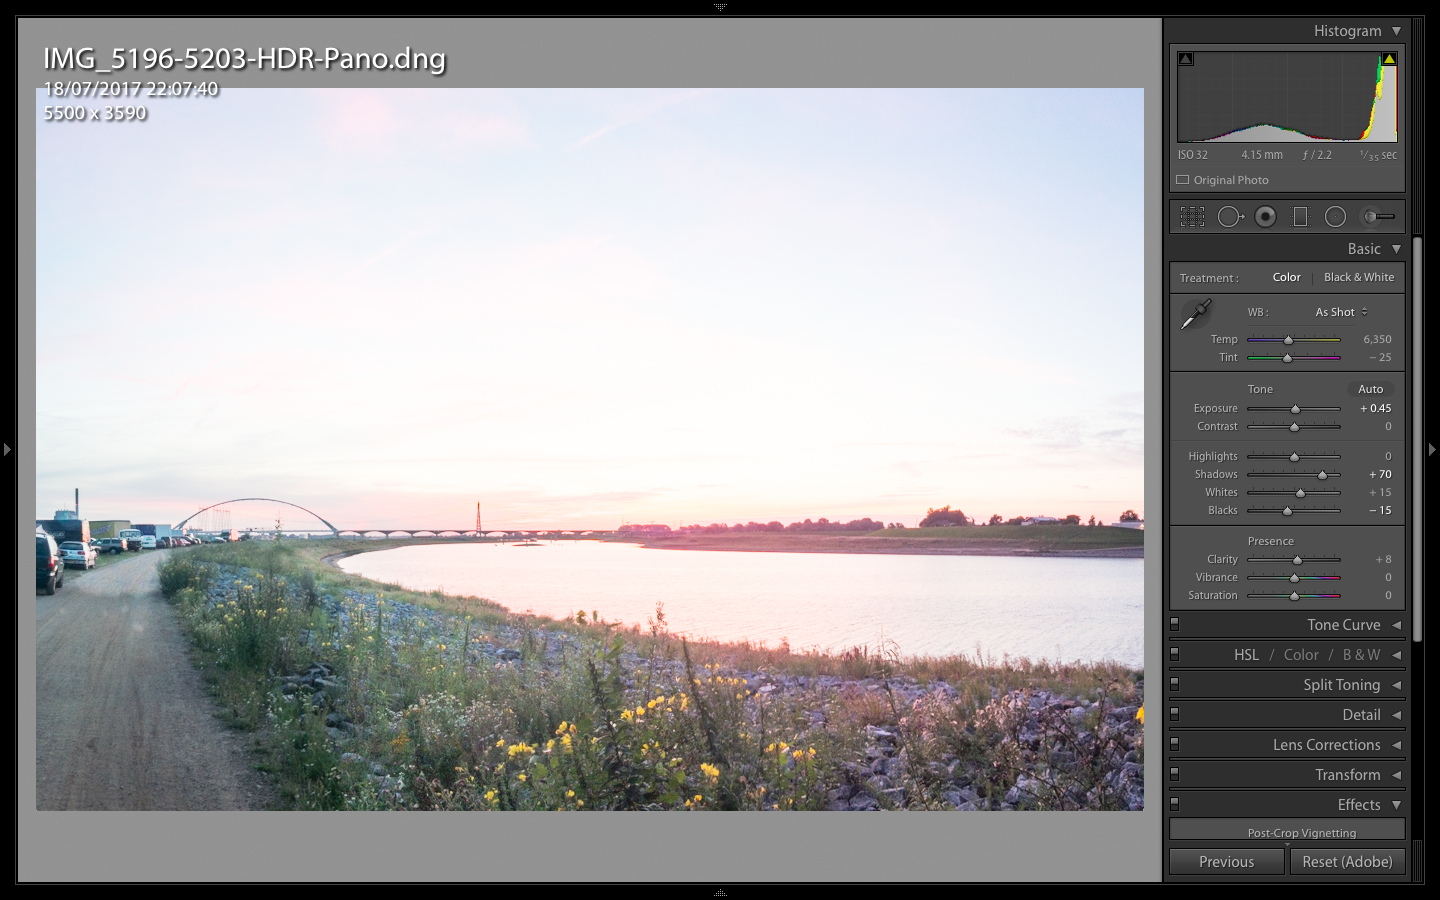
Sunsets tend to be difficult photos to get quite right, even with HDR. In this case, the resulting image looks rather overexposed, but remember: this is an HDR image — there are loads of details in the digital negative. So, my first step is to crank the exposure slider from +0.45 to -1.00.
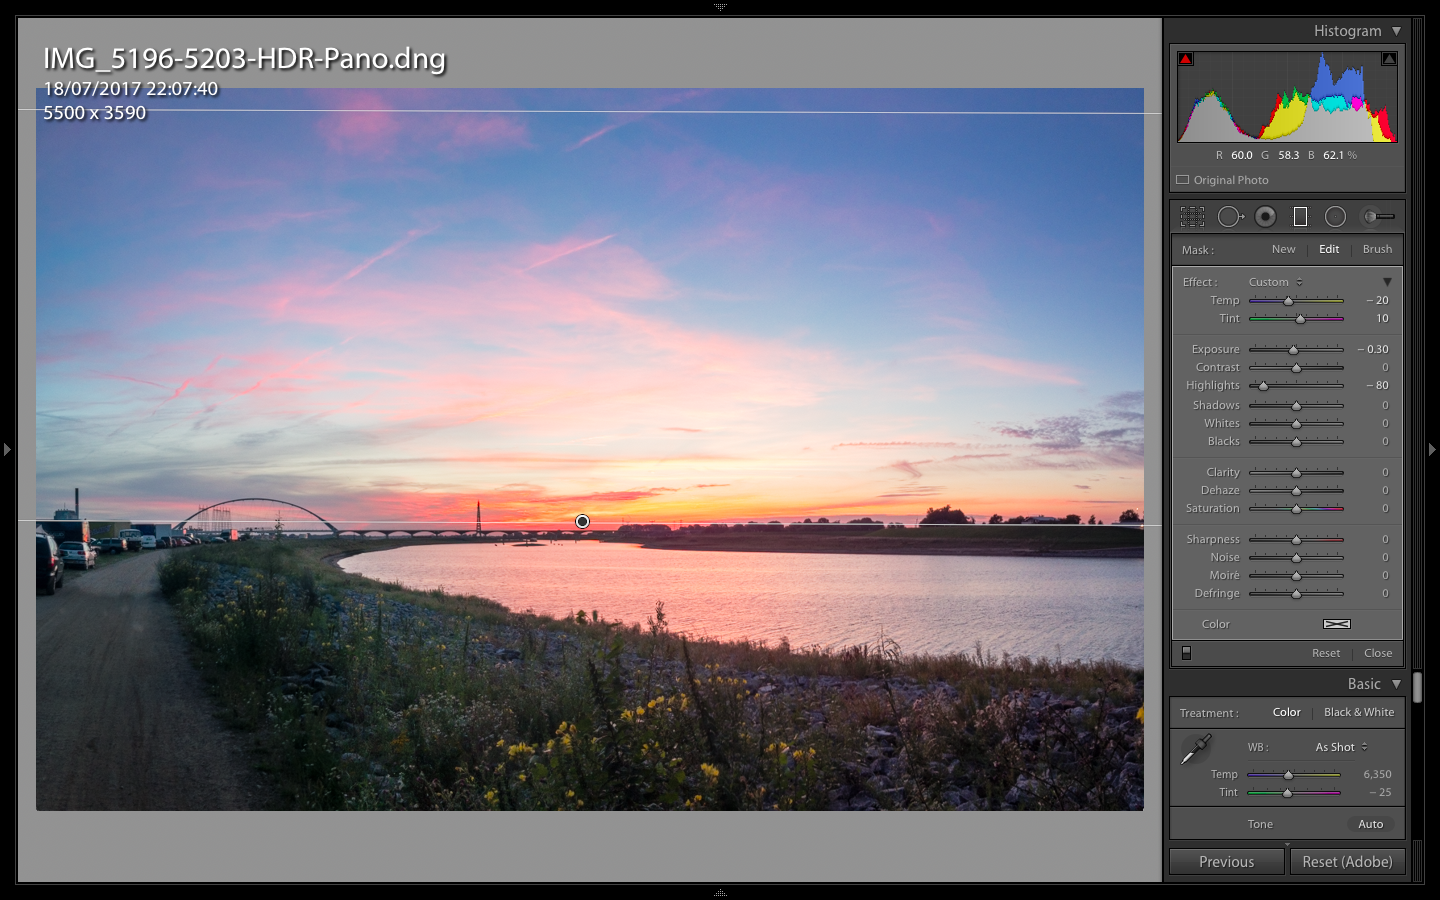
This looks more like it. The ground level has settled nicely, but the sky still looks a bit washed. Like last time, I'm addressing that using a graduated filter, analogue to the filters you can mount on your proper DSLR camera.
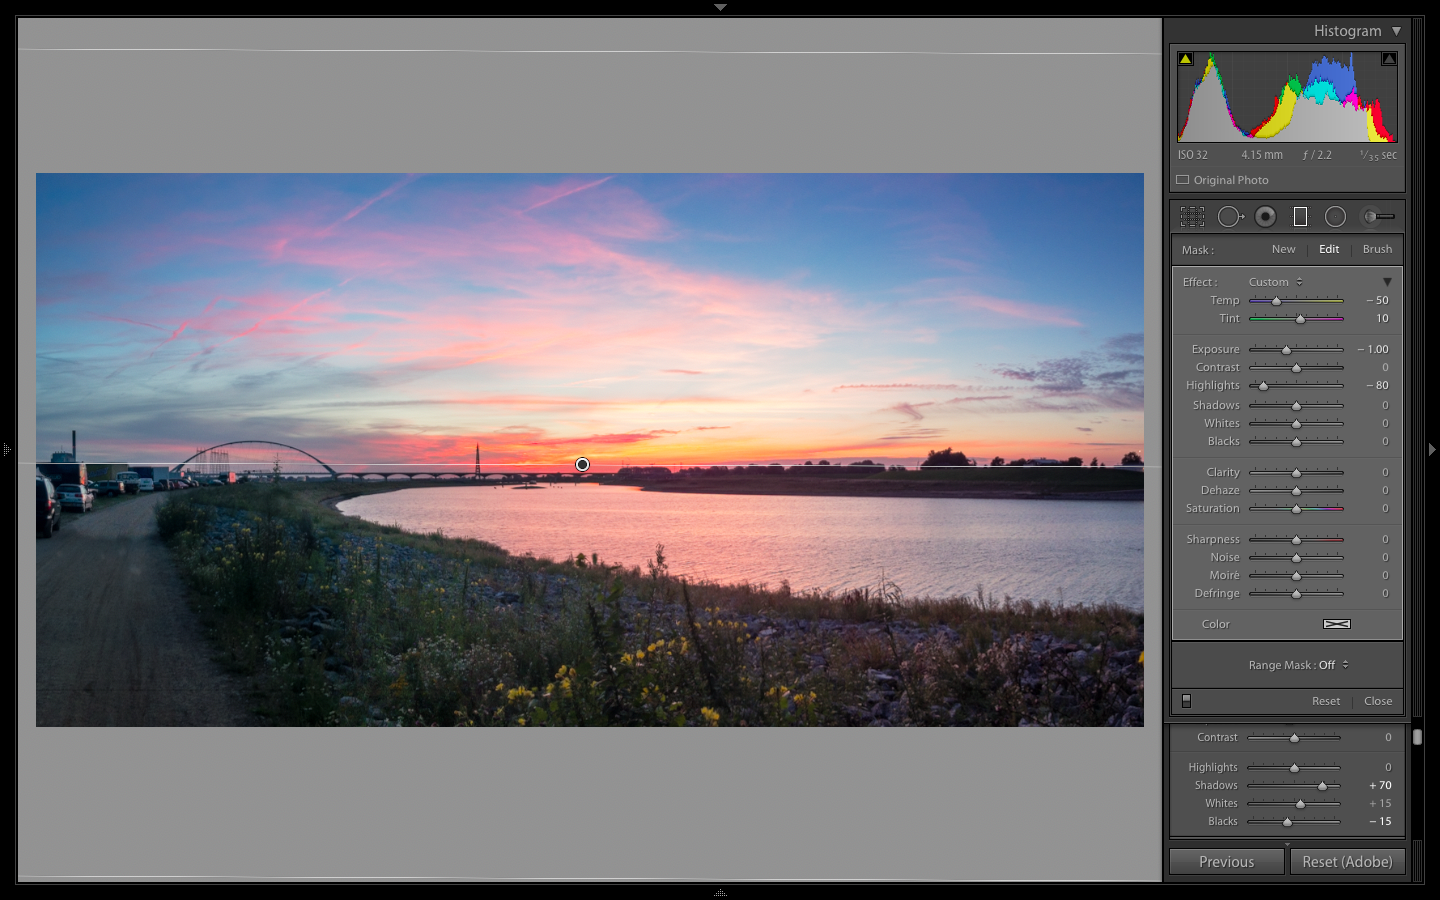
Select the graduated filter tool (it's icon is in the middle of the toolbar) and drag it from the top of the image to the horizon — or in this case, where the sky stops and cityscape begins. If you hold the shift key, the tool will be constrained in one direction to ease placement.
Configure the tool's effect on the right. In this case, I have set it to downplay the highlights quite a bit, so more details are visible. I've also adjusted the white balance slightly, so the colours are a little bluer.
I'm liking what I'm seeing, so the next step is to crop the image. Last time, we ended up using a 2 : 1 aspect ratio, and I rather liked how that turned out, so let's do that here as well.
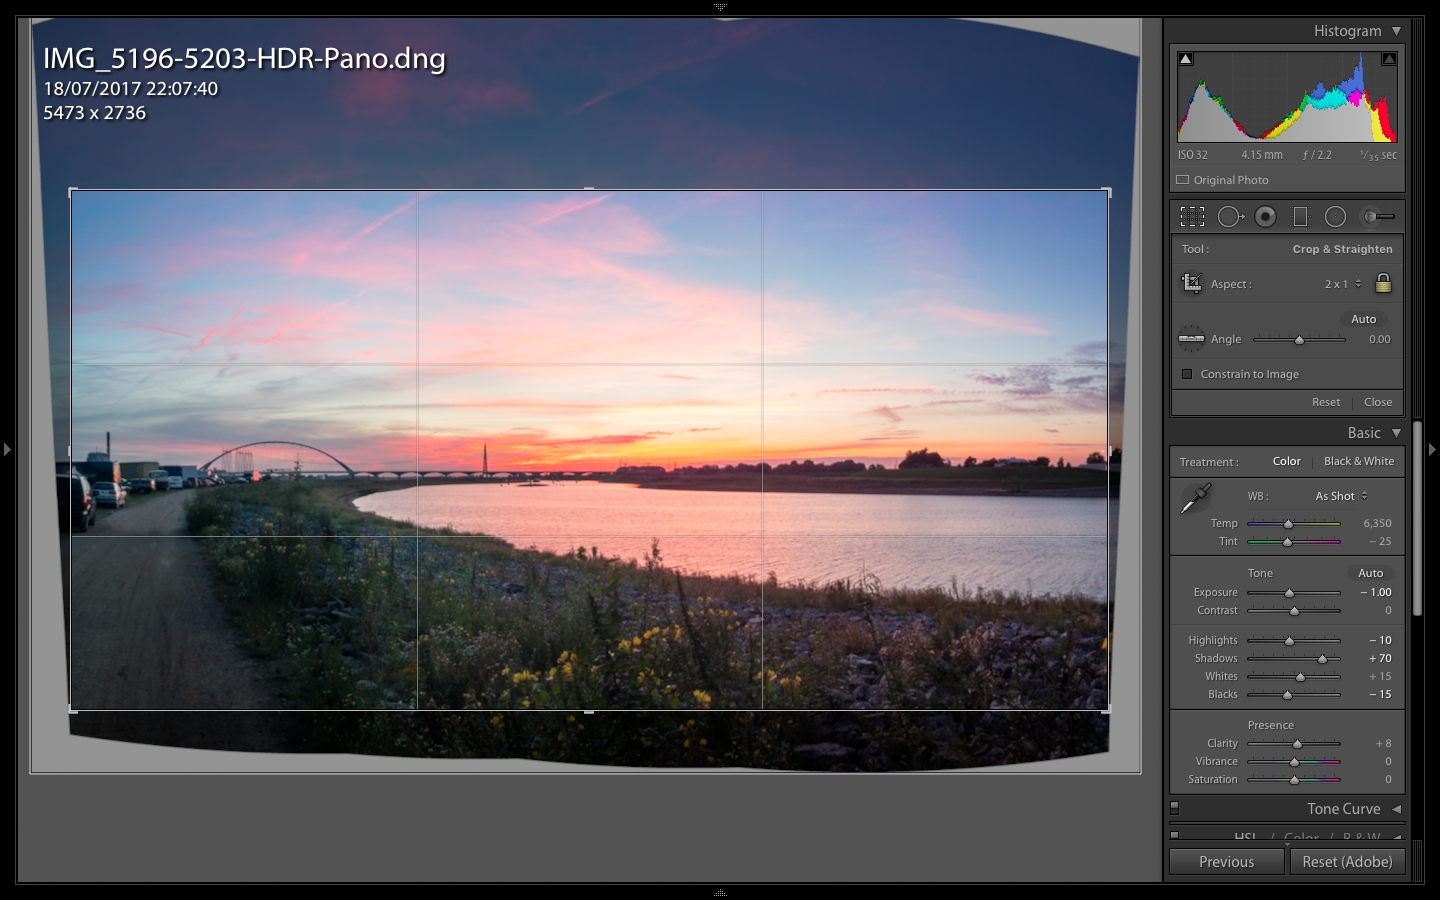
This feels like a nicely constrained composition to me. However, I'm not quite satisfied with the sky yet.
Let's open the graduated filter tool again, and select the filter we created earlier. On the right, I have adjusted the exposure slider from +0.3 to -1.0, so the sky is a little less exposed once more.
Final touches
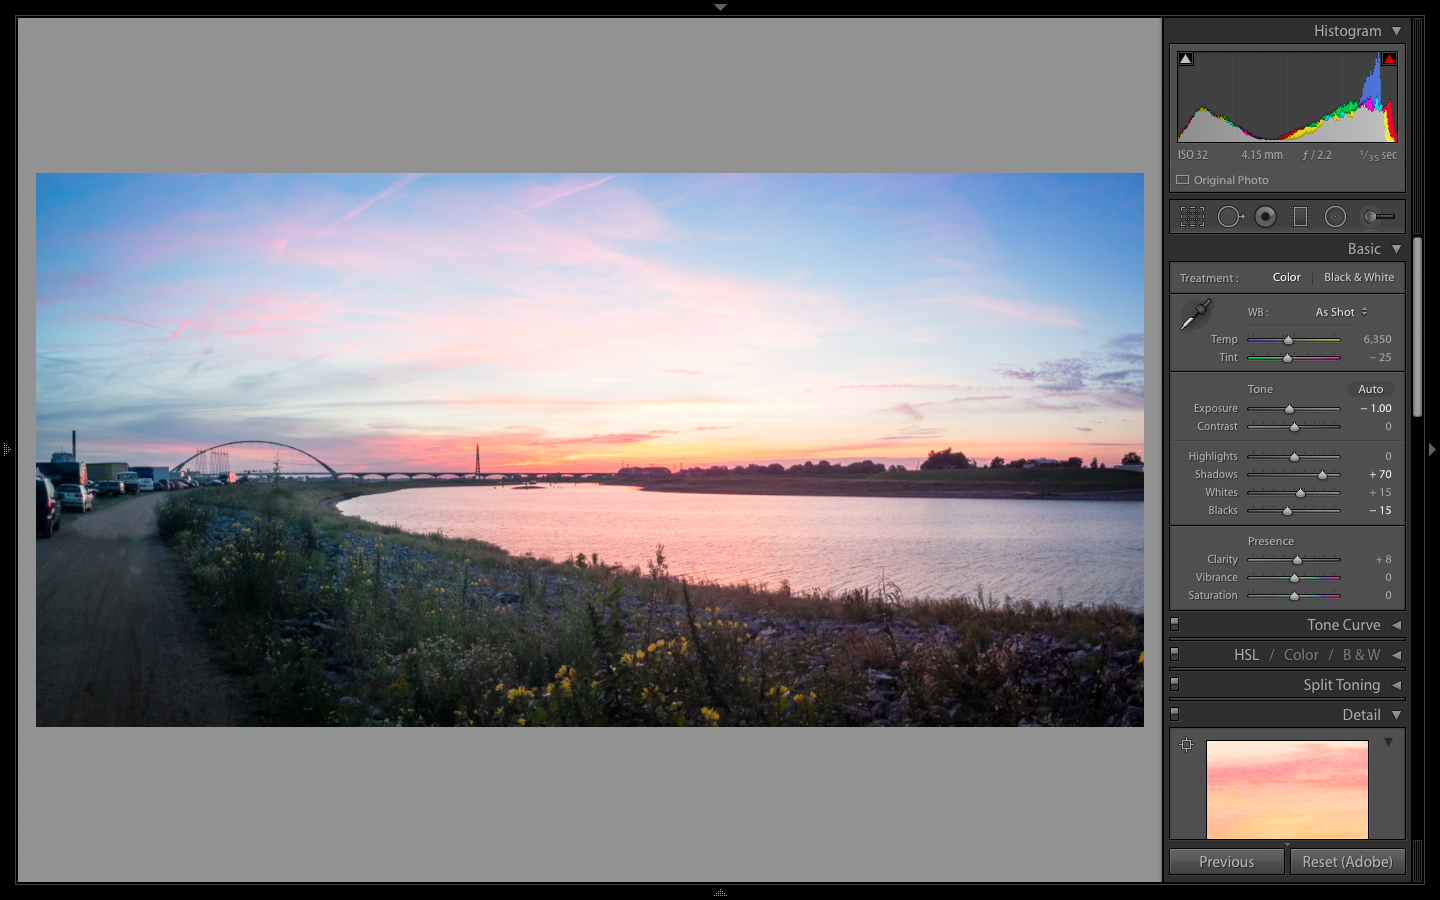
As a final touch, I like to apply a slight post-crop vignette effect. As Lightroom's edits are all non-destructive, you can do this at any point in the editing process. Personally, however, I like to leave it for the final step.
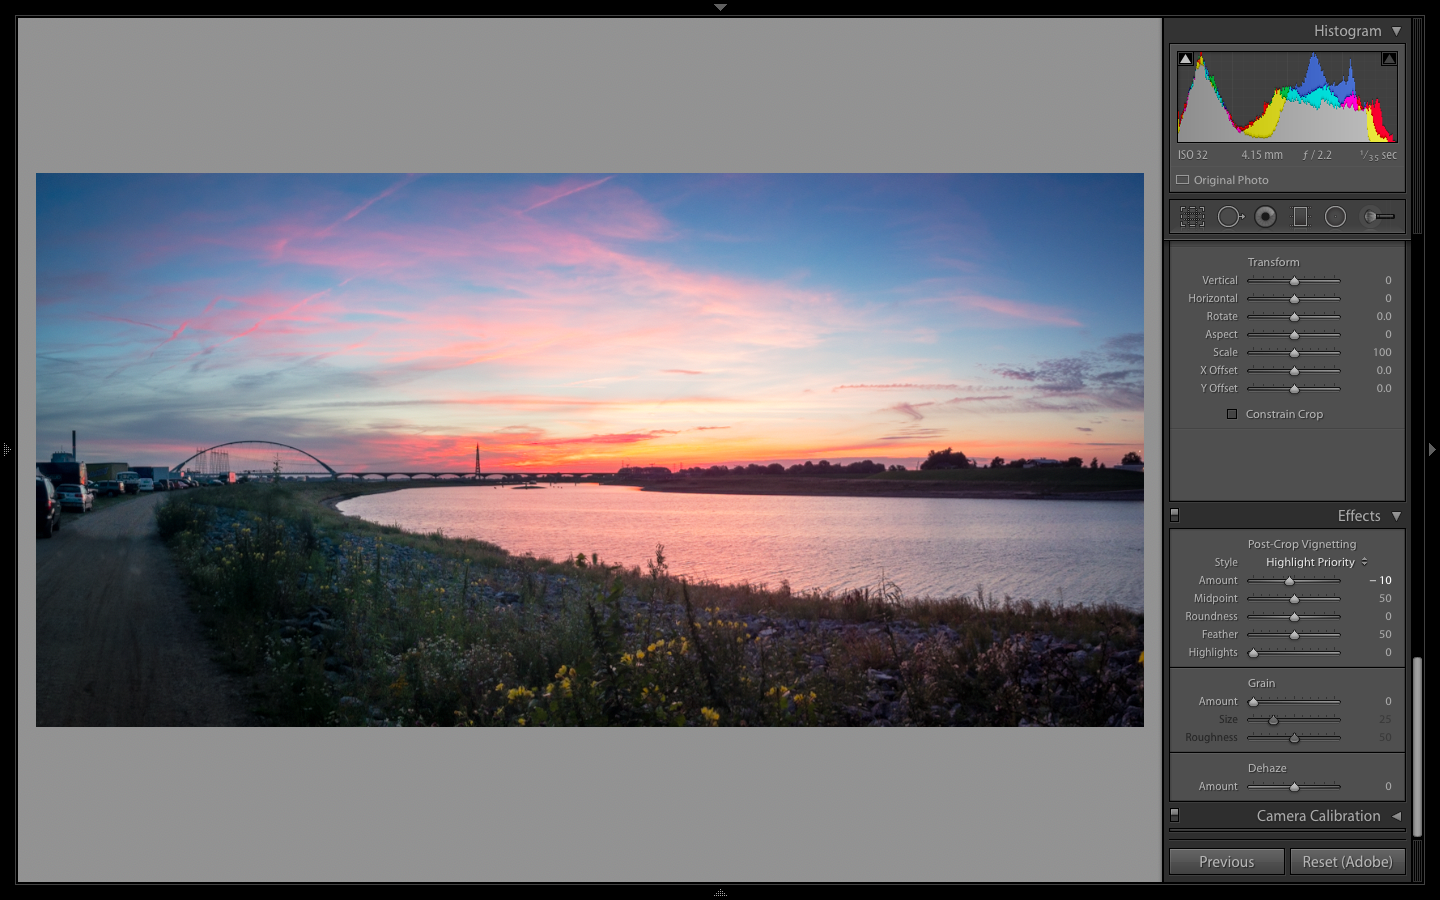
Some final adjustments to highlights and exposure:
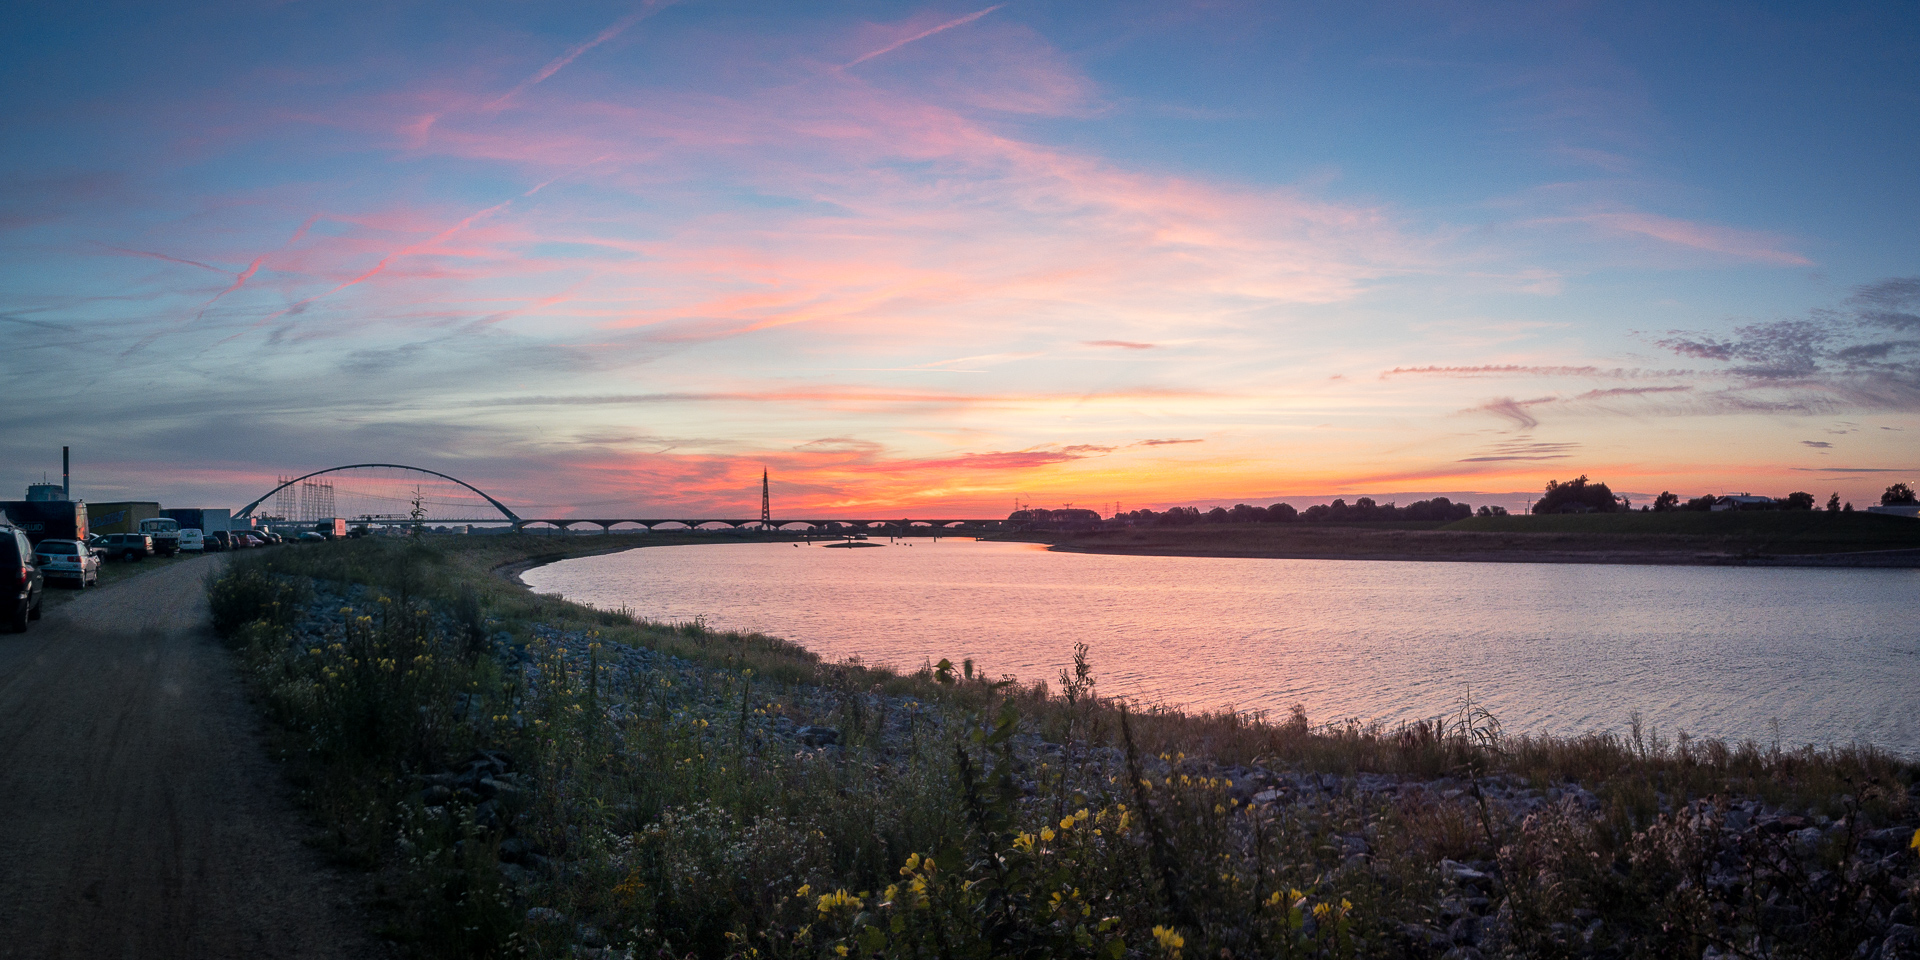
End result
Comments closed
This blog post has been archived; it is currently not possible to comment.