Set up your own CalDAV server on Debian to synchronise calendars and contacts between OS X and iOS
We've been using standardised protocols like IMAP to keep our mailboxes in sync between many devices for well over a decade. Our calendars and contacts haven't been as lucky; though there have been proprietary protocols to keep our data centralised (such as Microsoft Exchange and ActiveSync), the open protocol CalDAV was standardised fairly recently, in 2007. Its little sibling CardDAV is even more recent: it was standardised in 2011.
Many cloud services, such as Google Apps and Apple iCloud, are using these protocols to store and sync our data. But surely it's possible to set up and use our own servers?
After a quick search on the net, I stumbled across a tool called DAViCal. In this blog post, I'm detailing how to install it on your Debian server and configure it on your OS X and iOS devices.
Installing DAViCal
Fortunately, my own server runs Debian Wheezy, so installing it was fairly straightforward:
# apt-get install davical
The package depends on PHP and PostgreSQL, so if you haven't installed those, you'll be prompted to install their packages as well.
Note: at present DAViCal only works with PostgreSQL. Support for other relational database systems is in the works, however.
Configuring PostgreSQL
Debian's packages don't configure the database and web servers for us, so unfortunately, we'll have to do some work in that respect. First, we'll configure PostgreSQL.
Open up PostgreSQL's main configuration file in your favourite text editor (I use vim). If you're unsure where it resides, use:
# locate pg_hba.conf
For me, this yielded /etc/postgresql/9.1/main/pg_hba.conf.
Look for the line # DO NOT DISABLE!. Just below this comment block, add:
# DAViCal
local   davical   davical_app   trust
local   davical   davical_dba   trust
This will give DAViCal direct access to its own database in PostgreSQL, but only after we restart the PostgreSQL server:
# /etc/init.d/postgresql restart
Now, we need to create the database schema for DAViCal. Fortunately, the davical package ships with a script to do just this, so run:
# su postgres -c /usr/share/davical/dba/create-database.sh
Note that this will generate and print your admin password. Make sure to write it down somewhere.
Configuring your web server
I'm using nginx as my web server, so I'll be detailing on that. If you're using Apache, check out the official config example.
Append a server entry for your DAViCal (sub)domain to your nginx config. I'm using something like the following. Don't forget to substitute your.host.name and 127.0.0.1:1337 for whatever's relevant for you.
Note: for the purposes of this tutorial, SSL/TLS configuration is omitted. I do, however, strongly recommend you configure it!
server {
    listen 80;
    listen [::]:80;

    server_name your.host.name;

    access_log  /var/log/nginx/your.host.name.access.log;
    error_log  /var/log/nginx/your.host.name.error.log;

    root   /usr/share/davical/htdocs;
    index  index.php;

    location / {
        rewrite ^/principals/users/(.+)$    http://your.host.name/caldav.php/$1 break;
        rewrite /.well-known/(.+)$          http://your.host.name/caldav.php/.well-known/$1 break;
    }

    location ~ ^(.+\.php)(.*)$ {
        include                     fastcgi_params;
        fastcgi_param               SCRIPT_FILENAME $document_root$fastcgi_script_name;
        fastcgi_pass                127.0.0.1:1337;
        fastcgi_split_path_info     ^(.+\.php)(.*)$;
        fastcgi_param               PATH_INFO $fastcgi_path_info;
        fastcgi_param               PATH_TRANSLATED $document_root$fastcgi_path_info;
        fastcgi_read_timeout        180;
        fastcgi_buffer_size         128k;
        fastcgi_buffers             4 256k;
    }

    location ~ .php$ {
        try_files                   $uri =404;
        include                     fastcgi_params;
        fastcgi_pass                127.0.0.1:1337;
        fastcgi_index               index.php;
        fastcgi_split_path_info     ^(.+\.php)(.*)$;
        fastcgi_param               SCRIPT_FILENAME  $document_root$fastcgi_script_name;
        fastcgi_param               PATH_INFO $fastcgi_path_info;
        fastcgi_param               PATH_TRANSLATED $document_root$fastcgi_path_info;
    }
}
Don't forget to reload nginx:
# /etc/init.d/nginx reload
Configuring your DNS
You'll need to add both a subdomain and an SRV record to your DNS record. I'm assuming you know how to do the former; an SRV record is somewhat more special and will be used for CalDAV autodetection. Add the following to your DNS records:
 _caldav._tcp   SRV   0 5 80 your.host.name.
_carddav._tcp   SRV   0 5 80 your.host.name.
If you'll be using HTTPS, substitute 80 with 443.
Configuring DAViCal
After the DNS has been propagated, point your browser to the host name you configured earlier. If everything went well so far, you should be greeted by a DAViCal screen saying it needs a config file. Fortunately, they are easy to create. Open your favourite text editor and write:
<?php
$c->domain_name  = 'your.host.name';
$c->admin_email  = 'admin@your.host.name';
$c->system_name  = 'Timey Wimey Calendar Server';
$c->local_tzid   = 'Europe/Amsterdam';
$c->pg_connect[] = 'dbname=davical port=5432 user=davical_app';
Save this to either /etc/davical/config.php or, if you'd like to configure more than one domain, /etc/davical/your.host.name-conf.php.
Reload the page. You should see a more interesting page now! Log in with the details shown when you ran create-database.sh earlier.
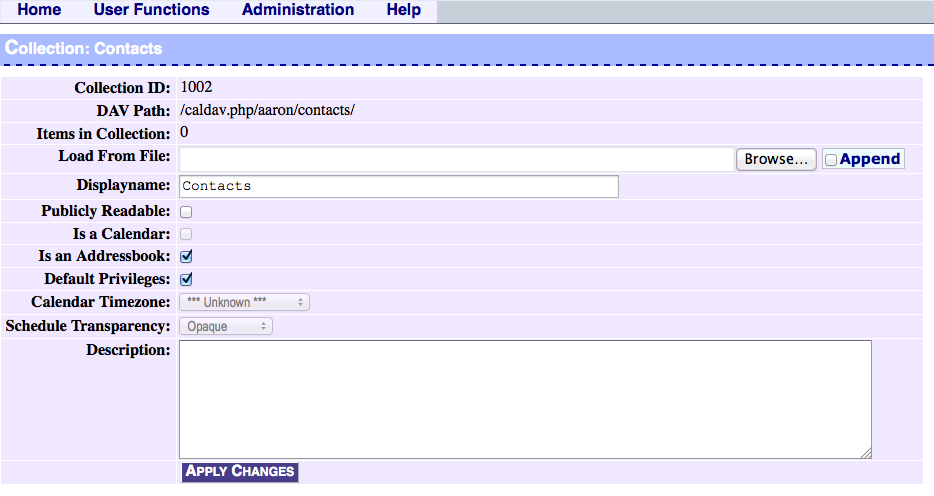
This should speak for itself. You can create users and add collections (calendars, contacts, etc.) to each of them. Most programs I've worked with required an initial collection, so I created an initial calendar and collection here. Do not forget to (un)tick the relevant boxes!
Configuring Calendar.app (iCal)
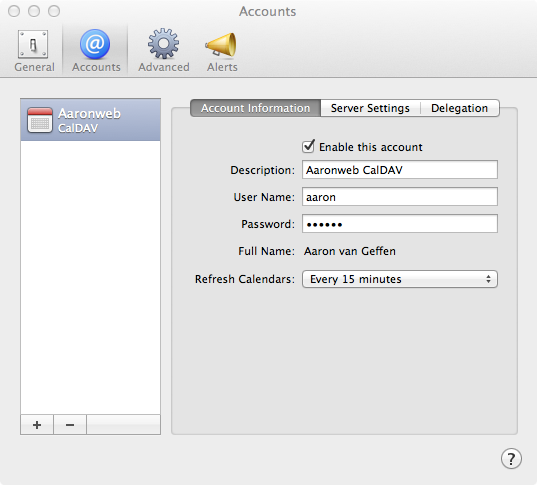
In Calendar, go to the app menu → Preferences (cmd+,) and select the Accounts tab. Click the [+] in the bottom and choose 'CalDAV' in the next screen. Fill out your details; as server address, use your.host.name/caldav.php/username/collection/ and click 'Create'.

You should now see a list similar to the below:
If you're having problems adding your account, please see the troubleshooting section below.
Configuring Contacts.app (Address Book)
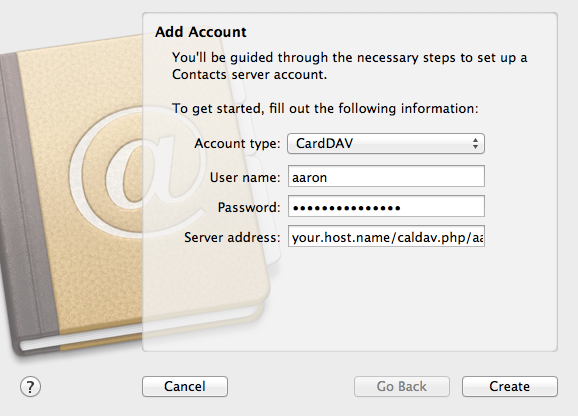
In Contacts, go to the app menu → Preferences (cmd+,) and select the Accounts tab. Click the [+] in the bottom and choose 'CardDAV' in the next screen. Fill out your details; as server address, use your.host.name/caldav.php/username/collection/ and click 'Create'.
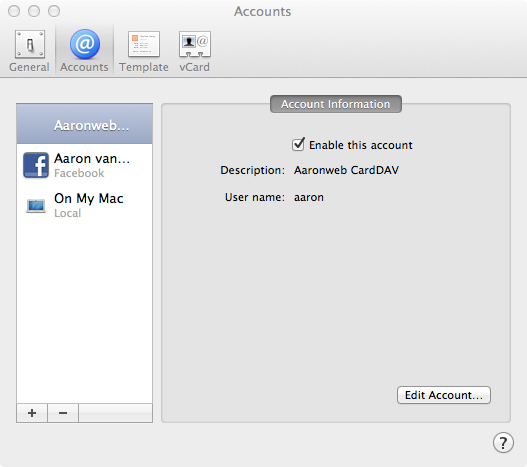
You should now see a list similar to the below:
Configuring your iOS device (iPhone / iPod Touch / iPad)
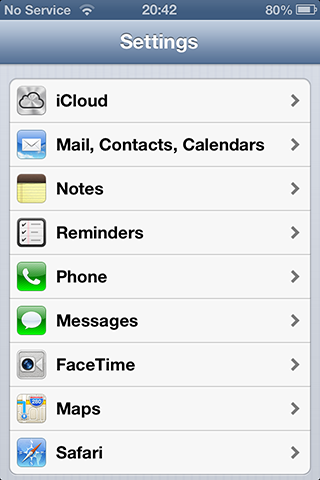
In your home screen, select to the Settings app and go to "Mail, Contacts & Calendars".
Then, scroll all the way to the bottom and select 'Other'. You'll end up in the following screen:
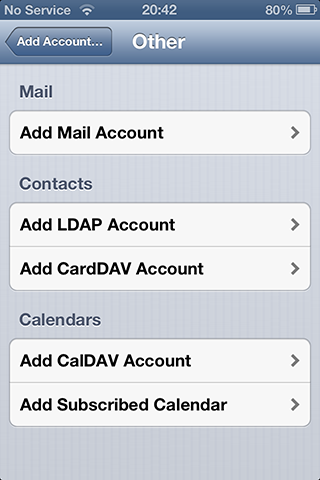
Add both a CalDAV and CardDAV account, using settings analogue to the OS X desktop applications as described above.
Troubleshooting
OS X detects my server as a Google server!
If you're using Google Apps, Apple's software may mistakenly detect your CalDAV server as a Google (Gmail) server, resulting in not being able to log in. At the time of writing, I encountered this problem using OS X 10.8.2.
Though not ideal, you can work around this by temporarily deleting (trashing) the following folder: /System/Library/InternetAccounts/Google.iaplugin. Delete the misclassified accounts, log out and log in again. You should now be able to add your account correctly.
How do I move my iPhone contacts without using the desktop?
I found this guide to be quite helpful.
What about Reminders?
Reminders are stored as calenders and use Calendar.app's settings. (Remember how in older versions of OS X reminders were part the Calendar.app?)
What about Notes?
Notes can be stored as emails. You should be able to set up their synchronisation in your IMAP account settings.
Comments, problems, suggestions?
If, after reading this blog post, you have any comments, please post a comment below! I'd love to hear from you.
Comments closed
This blog post has been archived; it is currently not possible to comment.